Expanding the World: A Guide to Adding Map Mods to Your Project Zomboid Server
Related Articles: Expanding the World: A Guide to Adding Map Mods to Your Project Zomboid Server
Introduction
With enthusiasm, let’s navigate through the intriguing topic related to Expanding the World: A Guide to Adding Map Mods to Your Project Zomboid Server. Let’s weave interesting information and offer fresh perspectives to the readers.
Table of Content
Expanding the World: A Guide to Adding Map Mods to Your Project Zomboid Server

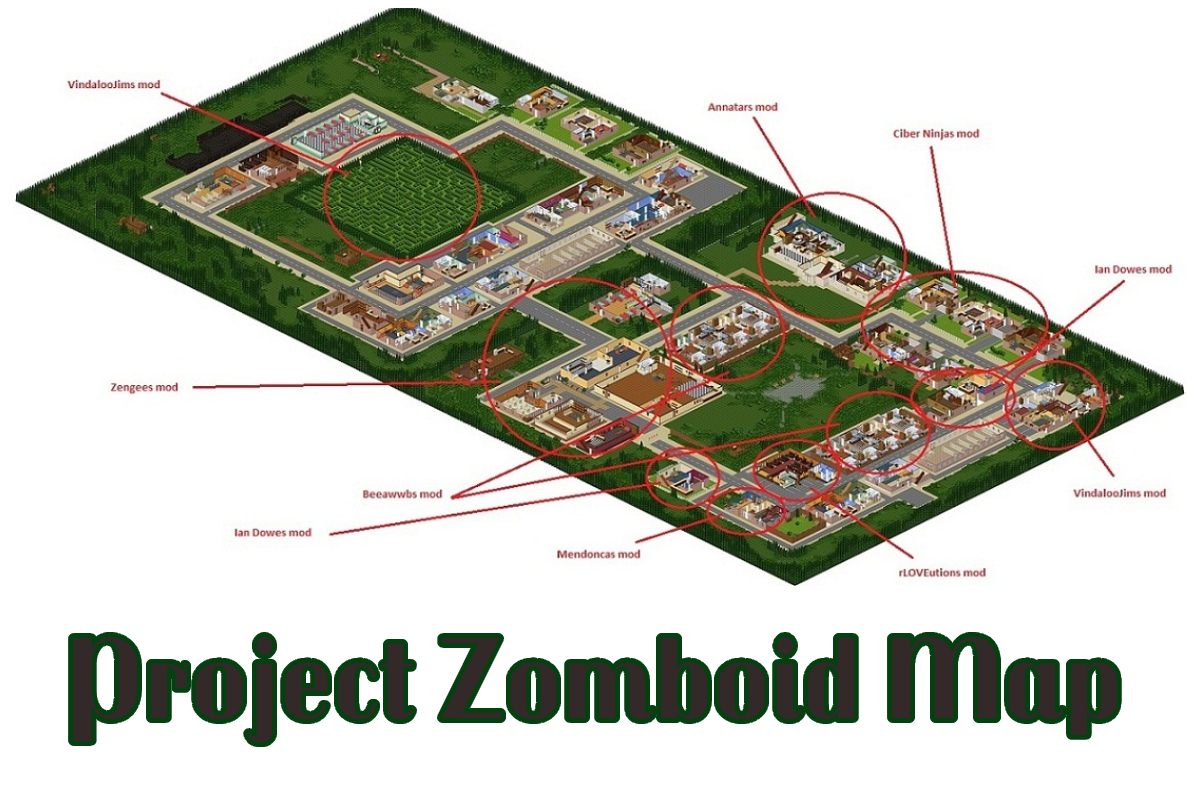
Project Zomboid, the beloved survival horror game, offers a vast and engaging world to explore. However, the desire to venture beyond the confines of the default maps is a common sentiment among players. This is where map mods come in, providing a gateway to diverse landscapes, intricate environments, and a multitude of new gameplay experiences.
Adding map mods to a Project Zomboid server is a straightforward process, empowering server administrators to customize the game’s world to their liking. This guide will explore the steps involved, from selecting the appropriate mods to seamlessly integrating them into your server, ensuring a smooth and enriching experience for your players.
Understanding the Fundamentals
Before diving into the technical aspects, it is crucial to grasp the core concepts of map mods in Project Zomboid.
-
Map Mod Types: Map mods are broadly categorized into two types:
- Overlays: These mods modify existing maps by adding new areas, structures, or points of interest without fundamentally altering the original map layout.
- Full Replacements: These mods replace the entire base map with a completely new world, offering a distinct setting and gameplay experience.
-
Mod Compatibility: It is essential to ensure that the chosen map mod is compatible with the current version of Project Zomboid. Older mods may not function correctly with newer game updates.
-
Server Administration: Adding map mods requires server administrator privileges. Only individuals with the necessary permissions can modify the server’s game files.
Steps to Add Map Mods to Your Project Zomboid Server
-
Choosing the Right Mods: The first step involves identifying the map mods that align with your vision for the server. Consider the following factors:
- Genre and Theme: Do you envision a bustling city, a rural countryside, or a post-apocalyptic wasteland?
- Size and Scope: How large do you want the map to be? Do you prefer a smaller, focused environment or a sprawling landscape?
- Gameplay Mechanics: Do you want a mod that introduces new features, such as unique items, crafting recipes, or challenges?
-
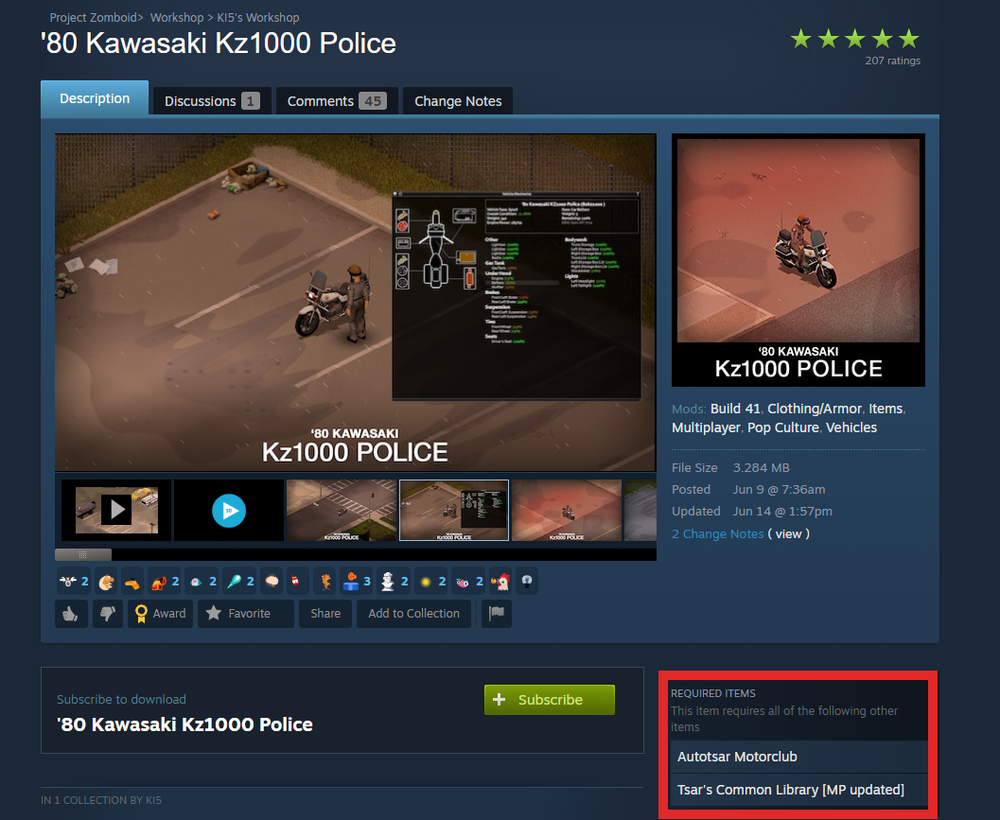
Downloading and Installing the Mods: Once you have selected your mods, download them from reputable sources like the Project Zomboid Mod Database or Steam Workshop.
- Mod Database: The official Project Zomboid Mod Database provides a comprehensive list of mods, including detailed descriptions, screenshots, and compatibility information.
- Steam Workshop: Steam Workshop offers a platform for sharing and discovering mods, including map mods.
-
Server File Modification: The next step involves adding the downloaded map mods to your server’s game files.
- Locate the Server Files: Navigate to the server’s installation directory. The exact location may vary depending on your operating system and server setup.
- Create a Mods Folder: Within the server directory, create a new folder named "mods".
- Place the Mod Files: Extract the downloaded map mod files and place them within the "mods" folder.
-
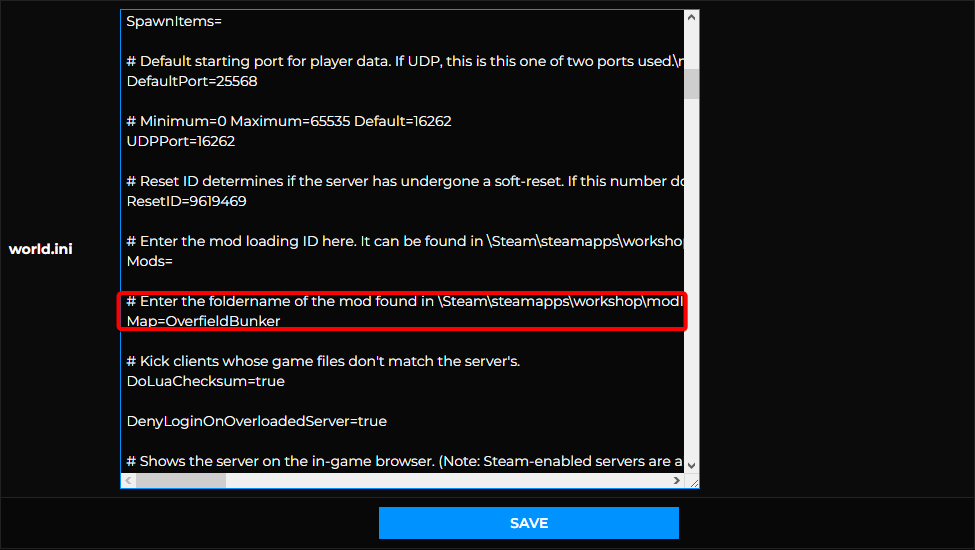
Server Configuration: After adding the map mods, you need to configure your server to recognize and load them.
-
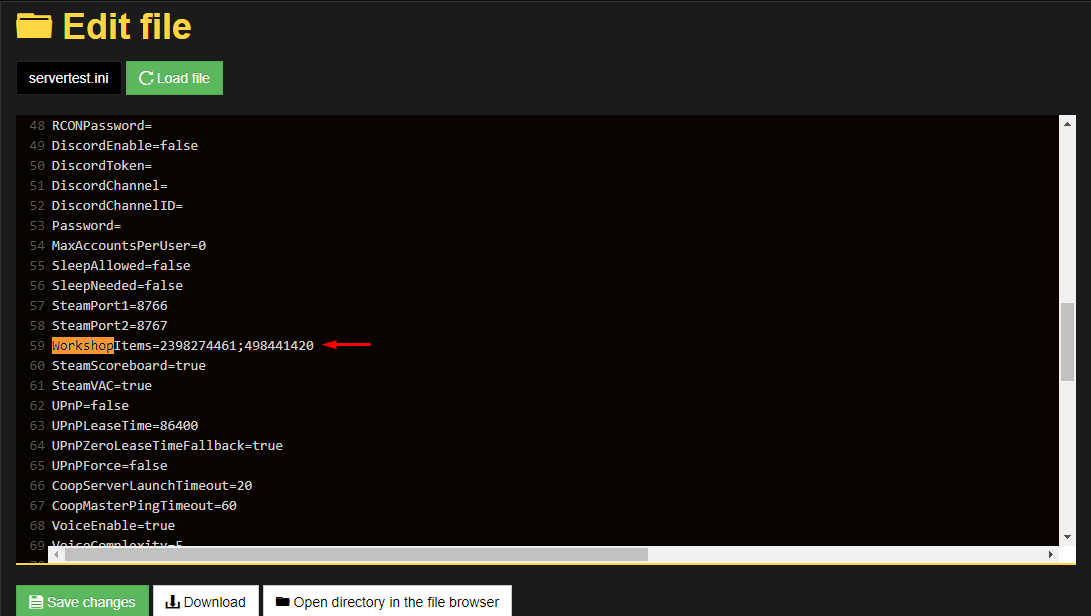
Server Settings: Open the server’s configuration file, typically named "serversettings.ini". This file is located within the server directory.
-
Mod Configuration: Within the "serversettings.ini" file, locate the "Mods" section. Add the following line, replacing "modname" with the actual name of your map mod:
Mods=modname -
Restart the Server: Save the changes to the "serversettings.ini" file and restart the server for the modifications to take effect.
-
Important Considerations
- Mod Updates: Regularly check for updates to your map mods. Outdated mods can cause conflicts and instability.
- Mod Conflicts: Be aware that certain mods may conflict with each other. Carefully review compatibility information and test your server with different combinations of mods.
- Performance Impact: Map mods can impact server performance, especially those with complex environments or large file sizes. Adjust server settings and monitor performance to ensure a smooth gameplay experience.
FAQs
-
Q: Can I use multiple map mods simultaneously?
- A: Yes, you can use multiple map mods on your server, but it is crucial to ensure compatibility and avoid conflicts.
-
Q: Can I change the map mod on my running server?
- A: It is generally recommended to stop the server, add or remove mods, and then restart the server for the changes to take effect.
-
Q: What happens if I remove a map mod from my server?
- A: Removing a map mod will revert the server to its previous state, potentially removing any structures or areas added by the mod.
-
Q: Can I create my own map mods?
- A: Yes, Project Zomboid offers a robust modding system, including tools for creating custom maps. Resources and tutorials are available online for those interested in map development.
Tips
- Back Up Your Server Files: Before making any significant changes to your server files, create a backup to prevent data loss.
- Test Mods Thoroughly: Test your mods thoroughly before making them available to players. This helps identify potential issues and ensure a seamless experience.
- Communicate with Players: Inform your players about any map changes, including new features or potential issues.
Conclusion
Adding map mods to your Project Zomboid server offers a powerful way to enhance the gameplay experience, providing players with fresh environments, challenges, and a sense of exploration. By carefully selecting, installing, and configuring mods, server administrators can tailor the world to their liking, creating a unique and engaging gaming experience for their community. With a little effort and planning, you can unlock a world of possibilities and keep your server thriving with exciting new content.


Closure
Thus, we hope this article has provided valuable insights into Expanding the World: A Guide to Adding Map Mods to Your Project Zomboid Server. We appreciate your attention to our article. See you in our next article!